Appliance Repair Questions?

Seabreeze Appliance Parts is also a part of Appliance 911 You may have landed on the wrong page because I am updating and using Google Blogger as support pages and links. If you have technical questions, need service manuals or appliance support click here=> http://appliance911seabreeze.com/ or contact me here with questions free=> I am here to answer any questions. Please if you have questions or need assistance contact me here==> appl.atyahoo.com

Tuesday, March 31, 2009

HOW TO LEVEL A REFRIGERATOR

Before leveling, unplug the appliance to avoid an electrical shock hazard. Never tip a refrigerator or freezer, it is very heavy and can fall causing damage or injury. It is important for the refrigerator to be level. If it is not level, doors may not open or close properly and may not seal tightly. Also, drainage from the defrost cycle might be impaired as might the ice making cycle. The appliance was engineered based on it being installed in a level position. While there may be some tolerance for out-of-level installation, the appliance will operate at its best when properly leveled.
Place a level on top of the refrigerator near the front. Do not put it on the door because the door may not be aligned with the refrigerator case. Check that the refrigerator is level from side to side. Next turn the level to check that it is level from front to back.
If it is not level, adjust one or more of the adjustable leveling feet until it is level. The feet are bolts that can be turned to raise or lower the refrigerator. If they cannot be adjusted with your fingers, use a crescent wrench or pliers. If you have an ice-maker, it should also be checked for level after first leveling the refrigerator. An icemaker that is out of level will spill water into the ice bin or into the freezer. It can be repositioned by loosening the mounting screws, adjusting it for level and then retightening the screws.
Thanks, Sea Breeze

HOW TO CHECK A COMPRESSORUnplug the refrigerator and remove the back panel that covers the compressor. There should be 3 wires going inside the cover of the compressor. Mark all 3 and mark their location so if compressor is OK you can put them back in same order. The plastic cover may snap on and you may need to squeeze the sides to unlock the cover and sometimes there is a metal clip holding the cover in place. Remove the cover. May look hard but it's simple. There will be three connections under the cover and 2 will go through the start relay. Unplug them leaving the three prongs exposed. They may be marked R =Run, S=Start and C=Common. Set your meter on continuity and then begin by testing 2 at a time until you have checked S to R and R to C an C to S and S to R again. You should get a reading all the way around. If no reading between any of the pairs as you go around you should get no reading between any two the compressor has an open winding and is defective.Then if it passes that test then touch one probe to R and the other to the copper pipes or clean metal on outside of compressor, then S to metal outside and C to metal outside. If you get a reading this way even just a little. The compressor is a burnout. Then let me know what you find. Thanks, Sea Breeze

WHEN YOU DON’T HAVE THE MODEL NUMBER CKICK HERE YOU JUST DON'T HAVE THE MODEL NUMBER

Your door switch may be the problem; it is a double pole single throw switch. When the door is closed the switch directs power to the dispenser. It also could be the control module in the dispenser panel. Not knowing your model number I must assume you also have a mother control board on the back of refrigerator. Send the model number found on the bottom of the fresh food section door frame and behind the door seal. Hope this helps, feel free to ask me more questions and please rate me! Thanks, Sea Breeze

Sunday, March 29, 2009

Refrigerator repair parts for Whirlpool, Maytag, Sears / Kenmore, GE, Frigidaire, Amana and other refrigerators. Evaporator fan motors, crisper drawers, defrost timers and heaters, cold controls, compressors, ice makers, and much more. Original high quality refrigerator parts at discounted prices.

452192 Defrost Heater below that Da74-40149D Water Control Valve

452192 Defrost Heater
Da74-40149D Water Control Valve
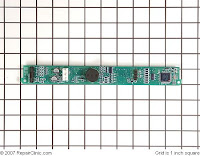
RoboForm: Learn more... WR55X10444 and 1156701 Dispenser Control Board

HOW TO CHECK FOR A BURNED OUT COMPRESSOR Unplug the refrigerator and remove the back panel that covers the compressor. There should be 3 wires going inside the cover of the compressor. Mark all 3 and mark their location so if compressor is OK you can put them back in same order. The plastic cover may snap on and you may need to squeeze the sides to unlock the cover and sometimes there is a metal clip holding the cover in place. Remove the cover. May look hard but it's simple. There will be three connections under the cover and 2 will go through the start relay. Unplug them leaving the three prongs exposed. They may be marked R =Run, S=Start and C=Common. Set your meter on continuity and then begin by testing 2 at a time until you have checked S to R and R to C an C to S and S to R again. You should get a reading all the way around. If no reading between any of the pairs as you go around you should get no reading between any two the compressor has an open winding and is defective. Then if it passes that test then touch one probe to R and the other to the copper pipes or clean metal on outside of compressor, then S to metal outside and C to metal outside. If you get a reading this way even just a little. The compressor is a burnout. Then let me know what you find. Thanks, Sea Breeze NEED HELP AND PHONE OR CHAT HELP? CLICK HERE=> SEA BREEZE

IF MY HELP HAS HELPED YOU, PLEASE CONSIDER A DONATION

Quadro FX 4600 67003753 Dual Water Control Valve 67005154 Dual Water Control Valve
WR50X10068 Defrost Thermostat
TESTING FOR A BURNED OUT COMPRESSOR PART 1 TESTING FOR A BURNED OUT COMPRESSOR PART 2